Showing posts with label Desserts. Show all posts

May 14, 2015

Insanely Awesome Recipes You Have to Add to Your Meal Plan

I don't know about you but the urge to add new recipe ideas to my already never-ending list of "Have to Try" seems to truly never end. I just can't help myself and the internet doesn't make this addiction any easier to handle....thanks a lot social media for making me a recipe hoarding addict!

So with that being said here are a few of my finds from this week. A few have already been tried and are going to my "Keeper" files. The others are going to my "Have to Try" list. Please tell me I am not the only one that has this list!


>>Loving this design<<


Breakfast....Bagel Bombs....Yes, please
Will make again.....Sriracha Caramel Corn....why?  Because it's addicting
Delish....Whiskey Slushes.....yum
I wonder.....Better Than Girl Scout Cookies......because I need to be convinced
Quick Dinner Idea.....Enchilada Spaghetti & Meatballs....change things up
Taste of Germany.....Bratwurst Sliders....OMG
Bacon...Bacon Cheeseburger Pizza....enough said
How about this Recipe?......Simple One Hour Bread.....yup, simple and great


If you have a great find of the week please do share. I not only found new recipes to try out but I also found a new blogs to follow....win win, if you ask me. What are some of your favorite blogs to follow?


July 21, 2014

Top 5 for 2013

I just realized I never did a Top 5 for my 2013 blog posts. That's what happens when you are moving from one state to another to then pack up and move half way across the world again....all in the matter of 4 months!!

The Top 5 for this year are still family favorites of ours. All 5 recipes can easily be incorporated into a meal plan, prepared in advance or even taken to a potluck.


1. Tamale Chicken Bake
This is an easy go to recipe if you love tamales but don't have the time or the know how to prepare tamales from scratch ;-)
 2. Strawberry Crisp
LOVE this recipe! So easy to make and so delicious.


3. Mexican Cornbread Salad
Not only does this taste yummy but it looks great too.

4. Sweet Sesame Chicken
One of my absolute favorite go to recipes I have.


 5. Turkey & Wild Rice Soup
Nothing taste better then homemade soup and fresh baked bread on a cloudy day.


July 29, 2013

Chocolate Lave Cake **my guest post**

I have been a bit of a break from cooking, baking and posting.....it's not that I have lost my drive but between summer vacation starting & ending, my college classes during their summer break, exams and lets not forgot our CRAZY hot temps AND flooding we had on our street/neighborhood!!


Before things got too off schedule and crazy for me I did share a recipe with Jutta over at Hungry Little Girl......she did it the right way, she sent all her blogger friends an email asking for us to fill her calendar with guest postings....GREAT idea ;-) NOTE TO SELF.....do this during the next school break!!!

Today it was shared on her blog so jump on over to Hungry Little Girl and check it out.
This is a recipe I got many many months ago when I was still a Pampered Chef consultant.


1 box Chocolate Cake mix (including the ingredients needed to prepare the cake as directed on the box)
1 tub chocolate frosting

Directions:
In a glass or stone baking dish combine the cake mix and the ingredients listed on the box. Stir until smooth.
Now drop 1 TBS size dollops of the frosting on top of the cake mixture.
Microwave, UNCOVERED for 10 minutes! FINISHED!!

Be careful removing the cake it will be hot. 

The lava sauce will be at the bottom of the cake so when you serve it you have to scoop it out and then flip the cake upside down to plate....if you want to. Try it with a scoop of vanilla ice cream...yum!

May 20, 2013

Pasta E Fagoli ***Surprise Recipe Swap***


Where has this month gone? Does anyone else like these past weeks have just slipped by them. It feels like we just had Spring Break and now my kiddos only have 3.5 days left before Summer Break starts!! 
I have been pretty busy with my current college schedule and on top of that schedule I had a house full of sick children....not a great combo at all. Thankfully I didn't catch the germs and that the germs have finally decided they don't like all the de-germifying I have been doing and have left our house ;-) So I hope you can all forgive me for not having posted much in the past days it really was not my intention to leave you hanging for so long.

Today is May 20th so that means we are FINALLY allowed sharing our partnered up with for the monthly Secret Recipe Swap hosted by Jutta over at Hungry Little Girl
I finally get to share the great recipes I have found and will be adding to my keeper files.
Spatulas on Parade was my stalking site for this months swap. Dawn the creator and editor of this blog has been doing a great job with providing a great variety of recipes. I browsed through her recipes and postings....and probably read every single one not because I couldn't find a good recipe but because I really liked SO MANY of her recipes and I REALLY felt she writes from the heart and the way it is.

Now to the recipe....recipes I decided to recreate.....first I decided on her Pasta E Fagoli Soup recipe and then I just couldn't help myself and also made her Everything Tropical Cake. I chose to make the soup because I love eating it at Olive Garden but since I don't go that often I wanted to have a recipe that would compare that I could make at home. The Everything Tropical Cake was chosen because I love coconut, pineapple and mangos but my husband doesn't...thankfully I had a Bunco night with some friends SO it was the perfect opportunity for me to try it! Another reason I wanted to try this recipe was because it is DAIRY & EGG FREE!! 


This is without the frosting.....it seems I can never get a picture with the frosting on my cakes!


Both recipes are keepers :-) 


1 lb ground beef or turkey (I used turkey)
1 tsp paprika
1 tsp italian seasoning
2 carrot, finely diced
2 stalks celery, finely diced
1 can diced tomatoes, drained
1 can kidney beans, drained and rinsed
1 can cannellini beans, drained and rinsed
26 oz. beef stock
1- 25 oz. jar of spaghetti sauce
1 tsp pepper
2 tsp oregano
2 tsp parsley
3/4 cup cooked pasted

Directions:
Cook beef or turkey with the paprika and italian seasoning ***I forgot to add the seasoning...oops***
Drain the fat from the pan before adding it to your crockpot. Add all the remaining ingredients and stir well. Cook on low 6-8 hrs or on high 3-4.   
30 minutes before serving add the cooked pasta and stir.
Serve with parmesan cheese and crispy bread.

~~~~~~~~~~~~~~~~~~~~~~~~~~~~~~~~~~~~~~

Everything Tropical Cake

1 1/2 cup flour plus 3 TBS
1 cup sugar
1 tsp baking soda
1/2 tsp salt
1 cup mango nectar
1 tsp white vinegar
5 TBS vegetable oil
3/4 cup shredded carrots
4 TBS crushed pineapple, after draining juices
1/3 cup coconut flakes
1/2 can white frosting
1/2 cup crushed pineapple with the juice

Directions:

Preheat oven to 350F. Lightly grease a glass 2.2 quart rectangle baking dish.
In a large mixing bowl combine the dry ingredients first and mix well. Then add the mango nectar, vinegar, and oil. Mix until combined. Stir in the carrots, pineapple and coconut flakes. Stir well and pour into your prepared pan. Bake 30 minutes, cake will be nice and golden.
Meanwhile, whisk together the frosting and crushed pineapple. Set this aside until the cakes has cooled.  

I decided to pour the frosting mixture onto the cake while it was still warm....well I think it would have been better to frost the cake until after it has cooled because my frosting disappeared!!! The cake was so warm that it melted the frosting! HAHA oh well...it wasn't a bad mistake but it didn't look as pretty as Dawn's cake ;-)


Joining Hungry Little Girl monthly Secret Recipe Swap is as easy as clicking on the link below!

HungryLittleGirl

May 1, 2013

Strawberry Crisp

Have strawberries been on sale like mad crazy every where or is it just in Tucson because I don't think I can remember the last time I have boughten and eaten so many strawberries!! Not to mention adding them to smoothies too.

This recipe that I am going to share with you was given to me by my mother in law and was for a Rhubarb Crisp. Rhubarb is used in a lot of different dessert in Germany but honestly I can't recall a single on being as yummy as the one my mother in law made. So of course I wanted the recipe and now I always keep a few servings of rhubarb in my freezer.


This recipe is easy to make and doesn't require too many ingredients either, another winner in my books. So far I have made it with rhubarb and strawberries but I do think you could try it with other fruit too. I am pretty sure I have some frozen peaches in my freezer...hhhmmm...I will keep let you know if I try it and how I like it!

3 cups strawberries, fresh or frozen (thawed)
1 small pkg strawberry Jello mix
1 box white or yellow cake mix
3/4 cup sugar
1 1/2 cups hot water, not boiling
1 stick butter, melted

Directions:
Preheat oven to 350F and lightly grease a 13x9 baking pan. Measure your water in either a microwave safe measuring cup or bowl, add your butter to this and heat just until butter is completely melted, set aside. 

Roughly chop strawberries and put them into your baking pan to cover the bottom, set aside. In a small bowl whisk together sugar and jello powder, then sprinkle this mixture evenly over the strawberries.  


Then sprinkle the dry cake mix next...if you notice any large clumps mash them up a bit.


Now carefully pour the butter & water mixture over the cake mix, try covering all of the cake mix with the water but don't worry if there are still a few spots not drenched.
Now bake for 45 minutes, the top should be golden brown and the juices bubbling on the sides. Cool for 15 minutes before serving, then refrigerate any leftovers.

***I like making this the day before I plan on serving it BUT love it hot out of the oven too.....it's just a little messier warm ;-)


February 19, 2013

Almond Biscotti

I really am trying to loose a few extra and unneeded pounds but I just can't help myself with not baking some sweets every so often. Thankfully I can control my cravings and don't eat too many at once. I seem to always eat more if I don't have anything sweet in the house to snack on. Anyone else have this problem??

I was going through my list of "tried and love" looking for a recipe for something that I know will turn out super and that will hit the spot. Have you ever had biscotti? It isn't your typical cookie and they aren't usually too sweet BUT  if you love coffee as much as I do then you probably love biscotti too.

I first made this while I was in Culinary School and am SO glad I saved this recipe. Thank You Chef Rogers for giving us this recipe and getting me hooked on Almond Biscotti!!! I wish you all could meet Chef Rogers....he was such a fun Chef to work with, you either enjoyed his personality or you didn't and if you didn't he knew ;-)


Almond Biscotti

1/2 cup butter, softened
1 1/4 cup sugar, divided
3 eggs
1 tsp vanilla extract
2 cups flour
2 tsp baking powder
1/8 tsp salt
1/2 cup chopped almonds

Directions:

Preheat oven to 375F. Line baking sheet with parchment paper and set aside.


Batter is sticky & soft but it is supposed to be this way.
Cream butter and 1 cup of sugar until light and fluffy. Add in one egg at a time, beating well after each addition. Stir in vanilla. Slowly add flour and baking powder to the butter mixture, along with the salt. Stir in almonds. Then divide dough in half and spread into two 12-in x 3-in rectangles. Sprinkle with the reserved 1/4 cup sugar before baking.

Bake 15-20 minutes or until golden brown. ***They are going to be a bit soft in the center still after this first step of baking***


Remove from oven and reduce oven heat to 300F. Lift the rectangles off of the cookie sheet but still on the parchment paper onto a cooling rack. Let cool for 15 minutes. After cooling, cut the rectangles 1/2 inch thick. Place the slices  cut side down onto an ungreased baking sheet. **you won't need parchment paper for this part even though mine are on it** Bake for 10 minutes; turn cookies over and bake for another 10 minutes.

Cool completely on cooling rack before storing in an airtight container.

February 7, 2013

Old Fashioned Muffins

I had the desire to try out a new recipe that I stumbled upon by accident. Doughnuts who doesn't like doughnuts? Honestly I don't because they don't like me ;-) I don't know if its because they are fried or if it is something in them that doesn't sit right with me but I just steer clear of them. SO when I saw the description of these on another fellow bloggers website I thought "heck why not give them a try" maybe this way I can get the taste of eating doughnuts without having to deal with the consequences.

Old Fashioned Muffins

1/4 cup butter, room temp
1/4 cup canola oil
1/2 cup sugar
1/3 cup brown sugar
2 eggs
1 1/2 tsp baking powder
1/4 tsp baking soda
3/4 tsp ground nutmeg
1 tsp cinnamon
3/4 tsp salt
1 tsp vanilla extract
2 2/3 cups flour
1 cup milk (I used lactose free milk)

Glaze (the best part)
3 TBS butter, melted
1 cup powdered sugar, sifted
3/4 tsp vanilla extract
2 TBS hot water

Directions:

Preheat oven to 425F. Line 12 muffin cups with muffin liners or spray with nonstick spray.
 **I used muffin liners...it got a bit messy when it came to glazing time and I think next time I will try them without liners**

This picture does not justice to how fluffy the batter is!!


In a large bowl beat butter, oil, sugar and brown sugar until creamy and smooth. Beat in one egg at a time. Turn mixer on low speed and add baking powder, baking soda, nutmeg, cinnamon, salt and vanilla extract mix until just combined. Slowly add flour into mixture alternately with milk. Stir just until combined, DO NOT OVERMIX.

I forgot to smooth the tops

Spoon batter into cups, filling them (they rise but not crazy out of control). There is enough batter for exactly 12 filled muffin cups. Smooth batter before baking.
Bake 15-17 mins, rotate halfway through bake time.
Cool muffins 5 minutes in muffin pan before removing to cool. Cool 10 minutes before glazing.
Meanwhile while muffins are cooling prepare the glaze.

To make the glaze whisk glaze ingredients together until the mixture is smooth. 

Dip muffins into glaze, let the first dip set and then re-dip again.


Muffins taste great warm and will be keep at room temp for 1 day.....but I bet you won't even need to keep them that long!


****These could be frozen after cooling and then glazed once thawed****

December 7, 2012

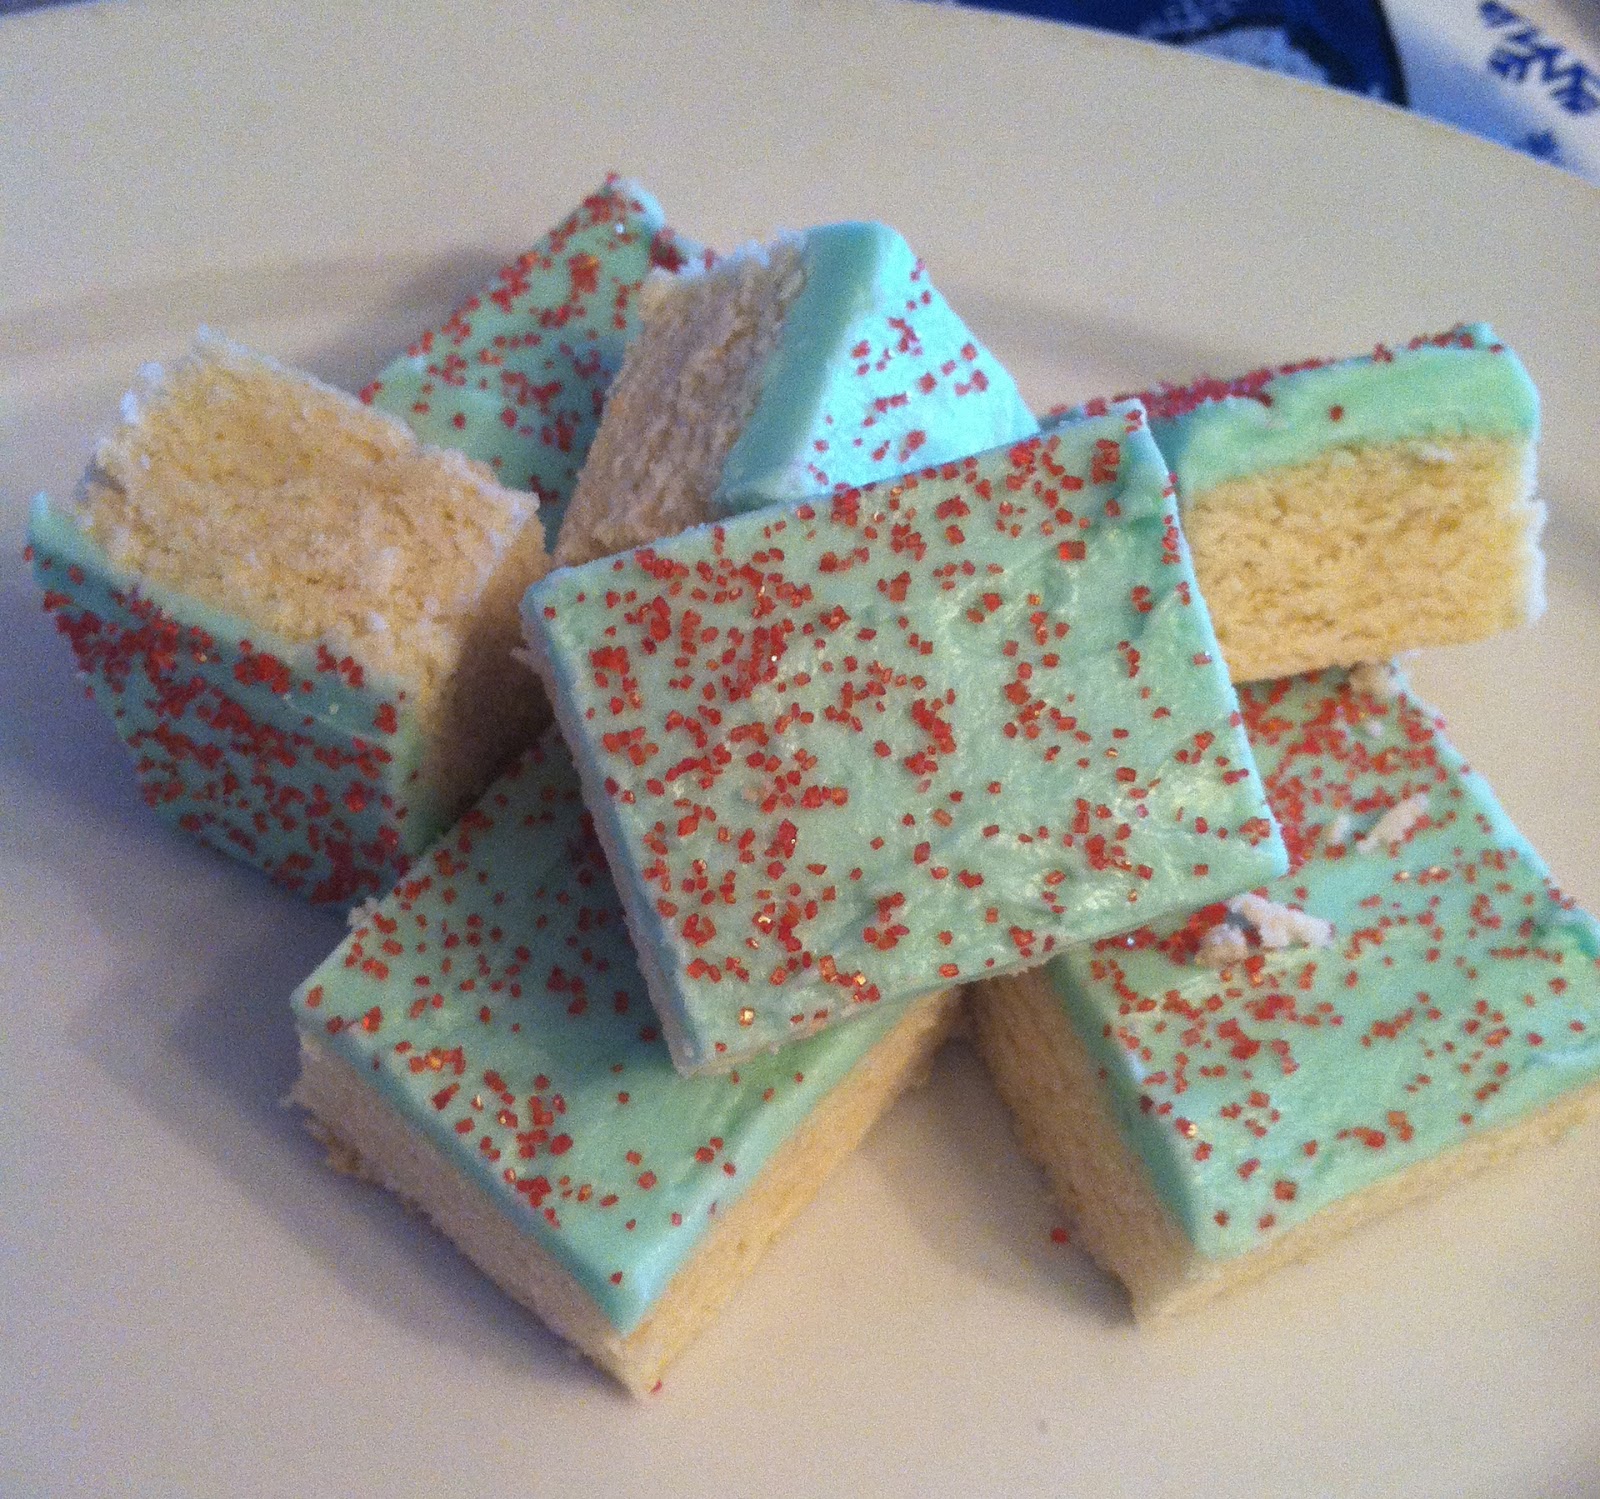
Sugar Cookie Squares

If you have young children then you have probably made cut out sugar cookies to decorate around the Christmas time. My kids love decorating sugar cookies for Santa, it is cute to listen to them talk about which one he will eat first, which one he will share with his elves or maybe even give to the reindeer.

Sugar cookies are yummy but sometimes they come out too hard, too thin or lacking flavor. The recipe I came across online has not only turned out to be a super easy recipe but didn't require a floured surface to roll out the dough on!! They came out full of flavor and super moist. I will be using this recipe for future sugar cookie cravings.....but of course if the kids "want" to roll out cookies for Santa I won't stop them!!


Sugar Cookie Squares

1/2 cup butter, softened
1 cup sugar
1 egg
1 egg white
1 1/2 TBS plain yogurt
1 tsp vanilla extract
2 1/2 cups flour
1 tsp baking powder
1/2 tsp salt

Directions:

Preheat oven to 375F 
Grease a 13x9 with nonstick cooking spray

Combine dry ingredients in a small bowl; set aside. Cream butter and sugar in a large bowl until fluffy. Add both the whole egg and egg white, vanilla extract and yogurt; mix until ingredients are incorporated. Slowly add the dry ingredient mixture; stir just until combine and dough comes together. **Do not over mix**
With lightly greased hands, press dough evenly into the prepared baking pan.

Bake 20 minutes, or until edges are lightly browned. 
**the top should not be brown, just the edges**

Now you can either leave the cookie in your baking pan to frost and cut into squares or you can let it cool about 15 minutes and then remove from baking pan to frost and cut. 


***next time I make these I am going to try to cut out shapes AFTER it comes out of the oven, I think it might work since the dough holds its shape well when cutting with a knife.....I will re-post an update once we give it a try***


November 6, 2012

Brunch Worthy

Boy oh boy did this weekend fly by!! And the temperature in my house was WAY hotter then it was outside LOL but well worth the effort of all the yummy treats I made. I made so many different recipes and have found some keepers.


Here is a list of everything I made:

Mini Citrus Muffins (these are easy and great to take to a social gathering)
Banana-Blueberry Bread (this is a favorite of mine)
Pumpkin Cinnamon Rolls (requires time but the result is well worth it)
Crockpot Breakfast Casserole (besides the burnt spot from my slowcooker having a hot spot this casserole is a keeper, especially since it cooks overnight and is ready in the morning)
Angel Food Lemon Bars (these are the perfect combo of lemony-sweetness)
Jalapeño Popper Dip (this is an absolute keeper)

Then I have to share Tiffany's a-m-a-z-i-n-g chocolate chip cookie recipe!! I gave her the Jalapeño Popper Dip recipe in exchange for this cookie recipe.

October 30, 2012

Red Velvet Cake Batter Dip

It's movie night at my house!! A few of my friends and I are getting ready for the last part to the Twilight sequel....Breaking Dawn Part 2 comes out November 17. So we are having   a Twilight movie night. We are watching "Twilight" and "New Moon" tonight and then the other two movies another night. Movie night has to have themed snacks!! I made a huge pot of spaghetti (since the Cullen's decide to cook Italian for Bella when she comes to visit their house for the first time). I also made Red Velvet Cake Batter Dip to represent the vampires and Puppy Chow for the werewolves.


The Red Velvet Dip has a sweet-creamy-chocolate flavor. I could eat it by the spoon-full and not even use a cookie to dip it in. I also thought the texture and consistency would work perfect on cupcakes. SO I will be keeping this recipe in mind when Valentine's Day comes around.


Red Velvet Cake Batter Dip

1 pkg. cream cheese ( I used the lactose free kind)
1/2 cup butter, softened
2 cups red velvet cake mix (dry not prepared)
2-3 cups powdered sugar
2-3 TBS milk ( lactose free used here too)

Beat cream cheese and butter until smooth. Slowly add 1 cup of red velvet cake mix at a time to the butter mixture. You may need to add 1-2 TBS of milk to keep the mixture smooth. Do the same with the powered sugar until you have reached a consistency that you like, again you may need to add 1-2 TBS of milk to keep the mixture smooth. ( I used the whole 3 cups)

Chill at least 1 hour before serving.

Serve with vanilla wafers or graham cracker sticks.


October 13, 2012

Pumpkin Spiced Biscotti

Most of my friends know that I love drinking coffee and that I love to bake so I am always trying out new recipes that might go good with a hot cup of coffee. Biscotti is one of many great combinations. Did you know that Biscotti actually means "baked twice"?

I have made chocolate biscotti and vanilla biscotti but this was my first time making a pumpkin one. So first I did a little online searching to see how much pumpkin was needed or what was too much. Should I use pumpkin spice or other spices? I decided to take a few recipes and try my own way instead. I will be making these again, but this time I will add chopped pecans to it (didn't have any to try it out this time around).


Pumpkin Biscotti

3/4 cup pumpkin puree
2 eggs
1 TBS vanilla extract
1 cup brown sugar
3 cups flour
1 tsp cinnamon
1 tsp pumpkin pie spice
1 tsp baking powder
1/2 tsp baking soda
1/4 tsp salt
1/2 cup chopped pecans (not used in these pictures)

2 squares white chocolate
1 tsp pumpkin pie spice

Preheat oven to 350F and line your cookie sheet with parchment paper. This batter does not spread much but you will need a second cookie sheet after cutting the biscotti.

Sift your dry ingredients together in a bowl; set aside. Mix the pumpkin puree, eggs, brown sugar and vanilla until well incorporated. Slowly add your dry ingredient mixture in little by little; mix on low until all the flour is mixed in. Stir in the chopped pecans.


After baking for the first 25 minutes
 Your batter will be very sticky and thick after you have added all the flour. Divide the batter into 2 logs onto your cookie sheets.  Bake for 25 minutes. Remove and cool for 10 minutes. Then you will need to cut your biscotti. Turn your temperature down to 300 F before returning your biscotti back to the oven.

Bake for 10 minutes, pull out of oven and flip each piece. Return to oven and bake another 10 minutes. Your biscotti may still feel a little soft after the last 10 minutes but don't worry it will dry out more while they are cooling.


While your biscotti is cooling you can melt your white chocolate and stir in the pumpkin pie spice to get ready for drizzling. Your biscotti should be cool enough that your drizzle won't melt.
Drizzled with white chocolate
 Once the chocolate is set store them in an air tight container. Eat them with hot coffee or tea! Enjoy!

October 5, 2012

Pumpkin Brownies


Today was one of those days!! Thankfully I was able to get some baking & cooking done AND most importantly I was able to get to the store to restock my coffee filters.....this better not ever happen again, I can't get up in the morning to no coffee filters!!


Pumpkin Brownies

1 box Brownie mix, Family size
1 can (15 oz) pumpkin puree, not pumpkin pie mix
(YES THAT IS IT)

Preheat oven to 350F and grease a square baking pan.

Hand mix your pumpkin puree and brownie mix until well incorporated. It will be thick and fudgy looking. Put batter into your prepped baking pan and smooth out the top. 

Bake 45 minutes, check your brownies with a cake tester or toothpick before removing.

Let cool 10 minutes in baking pan before inverting onto a cooling rack (I would not recommend leaving these in the pan to cool because they are very moist and could get soggy).


Verdict: Easy, healthy and SO fudge!! You can't really taste the pumpkin in these (maybe just a hint) but I didn't use any eggs or oil to make them so they are a winner in my book! Did I mention how YUMMY they smelled while they were baking???

September 19, 2012

Pumpkin Spiced Doughnuts

Fall is slowly making its way to Arizona!! Monsoon season is over and the first day of fall is only 3 days away. I can't wait to turn of our A/C and finally get to open the windows in our house for some fresh air again. Tomorrow is my son's 8th birthday!! Where have the years gone? For his birth"day" he gets to pick dinner since its on a school night and then Saturday we are having a Pool Party for him.....yes, I know I was just talking about how fall is making its way and yes we are still able to have a pool party.....this is the good part of fall season in Arizona. I even went to check the pool yesterday to make sure the water is still comfortable.

This past Sunday my husband woke up and asked if we should go out for breakfast, which I had to turn down since we had been gone all day Saturday and we were going over to friends for a BBQ & Football. I asked him why he wanted to go out for breakfast and he replied with: "I am hungry for something good.....like Pumpkin Doughnuts". I jumped out of bed and said:"I have a recipe I have been wanting to try out for Homemade Pumpkin Doughnuts and I even have pumpkin in the pantry".


 So off to the kitchen I went!
Since I have never even tried making doughnuts EVER before I was not convinced this recipe would work or taste good. The original recipe called for buttermilk, which we never have in the house so instead I use Greek yogurt (this we always have). The dough was super easy to make and it was also really sticky, another reason I didn't think it was going to work. BUT you do have to put the batter in the freezer for 15 minutes before you press it out to cut into shape.

**A little tip: cut all your doughnuts out before heating the oil to fry it in, otherwise you might have a flour mess like I did because I didn't think the doughnuts were going to cook as fast as they did**


Cinnamon & Sugar plunge
Don't mind the jug of baby water in the background my husband pulled the camera out and I was so impressed with the way the doughnuts were turning out and slightly freaked out about all the flour I had tossed all over the kitchen that I didn't even notice the water jug in the background until I went to edit my pictures.

I don't think I will ever buy store bought pumpkin doughnuts again after making these!!! These doughnuts hit the spot on taste, texture and freshness. 


Here is my recipe for:


1 whole egg
1 egg yolk
1 cup canned pumpkin puree (not pumpkin pie filling)
1/2 cup sugar
1/2 cup buttermilk <<<<greek yogurt
1/4 cup brown sugar
3 TBS butter, melted
4 tsp baking powder
2 tsp pumpkin spice
1 TBS salt
1/2 tsp baking soda
3 cups flour, plus extra for patting out

Directions:

In a large bowl whisk together both the whole egg and the egg yolk until frothy. Add pumpkin, sugar, buttermilk (yogurt), brown sugar and butter; whisk until combined. Stir in baking powder, pumpkin spice, salt and baking soda.
Gradually fold in flour until a sticky dough forms; cover and put in freezer for 15 minutes.
Meanwhile get your pan ready for frying. You will need at least 2" of oil.....don't heat until after you have cut your doughnuts.
Take dough out of freezer and pat out on a well floured surface to 1/2" thick and then cut using either a doughnut cutter or 2 biscuit cutters. Transfer these to a floured baking sheet.
Now heat your oil to at least 370F before you start frying your doughnuts. Fry doughnuts and doughnut holes until browned, about 3 minutes turning once halfway through. Keep an eye on these so they don't burn! Place the finished doughnuts on a baking sheet lined with paper towel. When they have cooled enough to touch finish them by dipping them in a cinnamon and sugar mixture. ( 1 cup + 1 tsp cinnamon).


Eat these fresh, they do not taste to great the next day ;-)