Showing posts with label Cookies. Show all posts

May 14, 2015

Insanely Awesome Recipes You Have to Add to Your Meal Plan

I don't know about you but the urge to add new recipe ideas to my already never-ending list of "Have to Try" seems to truly never end. I just can't help myself and the internet doesn't make this addiction any easier to handle....thanks a lot social media for making me a recipe hoarding addict!

So with that being said here are a few of my finds from this week. A few have already been tried and are going to my "Keeper" files. The others are going to my "Have to Try" list. Please tell me I am not the only one that has this list!


>>Loving this design<<


Breakfast....Bagel Bombs....Yes, please
Will make again.....Sriracha Caramel Corn....why?  Because it's addicting
Delish....Whiskey Slushes.....yum
I wonder.....Better Than Girl Scout Cookies......because I need to be convinced
Quick Dinner Idea.....Enchilada Spaghetti & Meatballs....change things up
Taste of Germany.....Bratwurst Sliders....OMG
Bacon...Bacon Cheeseburger Pizza....enough said
How about this Recipe?......Simple One Hour Bread.....yup, simple and great


If you have a great find of the week please do share. I not only found new recipes to try out but I also found a new blogs to follow....win win, if you ask me. What are some of your favorite blogs to follow?


June 17, 2014

Gooey S'mores Cookies

I know it is an absolute must to make S'mores when you go camping and I would never not bring supplies to make them but I hate to admit it but I really don't love eating S'mores. As much as I love to bake and try new dessert recipes out I actually don't have a "real" sweet tooth and S'mores always seem to be too much "sweet" for me. At the same time though every time I make S'mores for my kids I always eat one too, I just can't help myself, smores are just one of those things that brings back memories of all the fun I had camping as a kid.
Now I know these cookies aren't "really" the same thing as making S'mores over an open fire BUT these are easy to make, take & share, they hit the spot when you aren't able to get a campfire going or if you just don't want marshmallow smeared all over your kiddos. 


Since we are talking about marshmallows, have you tried these Marshmallow Bits yet?? I really wasn't sure what to expect when I bought them but I have to tell you after eating a few I didn't automatically think of S'mores. The first thing that came to mind when I ate them was hot chocolate! These bits taste just like the little marshmallows you have floating around in your mug of hot chocolate....which is a must for me.
 
1/2 cup (1 stick) butter, softened
1/2 cup sugar
1/4 cup brown sugar
1 egg
1 teaspoon vanilla
1 1/3 cups flour
3/4 cup graham cracker crumbs 
(7 full graham cracker sheets)
1 teaspoon baking powder
1/2 teaspoon salt
1 cup Mini Hershey’s Kisses (or chocolate chips/chunks)
1 cup Jet Puffed Mallow Bits


Directions:

Preheat oven to 350 degrees F. Line a cookie sheet with parchment paper and spray with cooking spray.

Using a mixer, cream the butter and sugars until light and fluffy, about 3 minutes. Add the egg and vanilla and beat for an additional 2 minutes.

Meanwhile, use a food processor or blender to crush 7 graham cracker sheets into 3/4 cup fine crumbs. In a separate bowl, whisk together the graham cracker crumbs, flour, baking powder, and salt. Slowly add the dry ingredients to the wet ingredients, and mix on low speed until the dough just comes together. Add the chocolate and marshmallows and stir to combine.
Place 1.5 tablespoon sized scoops of dough onto the prepared cookie sheet.

Bake at 350 for 10-12 minutes.


Makes about 2 dozen cookies


March 20, 2013

Oreo Snickerdoodle Cookie Cake Bar


I have been waiting for my chance to get to take part in a virtual recipe swap and thanks to Jutta at HungryLittleGirl I was finally able too!!!

Tell me these don't look tempting?

Today is March 20th which means time to share my secret that I have been keeping for a few weeks now!! My assigned blog for the Surprise Recipe Swap was..... Little Accidents in the Kitchen :-) This blog has many different catagories to choose recipes from, I just saw a recipe on her blog for Maple Bacon Popcorn....why didn't I see this before I decided on my recipe to try because I know I will be giving this a try in the near future since I am a sucker for snacking on popcorn! 

Something really neat about Little Accidents in the Kitchen's author Joey is located in Singapore......one of the awesome things about the internet it really makes it so easy to connect with people all across the world with just the click of a button!! Joey also shares pictures of what she sees and where she goes while living in Singapore.

Ok...now to the recipe I decided to recreate.....Oreo Snickerdoodle Cookie Cake Bar. I chose this recipe for two reasons: 1. the name & 2. the pictures of this treat caught my attention right and I kept going back to them. Joey describes theses cookie cake bars the perfect combo of both worlds....eating a cake and a cookie in the same bite!! So I had to try them....but first I must admit something about Oreo's I really don't like the cream in the middle I prefer the cookie part the best (but don't tell anyone).

One more thing before I share the recipe for Oreo Snickerdoodle Cookie Cake Bar.....some of Joey's recipes have metric measurements which can be a little tricky if you do not have a scale that can weigh both in grams and pounds. THANKFULLY I have one!! Now I know that you could go online and use one of those nifty converters BUT I DO NOT recommend them when it comes to converting dry goods for a baking recipe. Trust me I have had my flops with cookies and bread using them ;-)


Oreo Snickerdoodle Cookie Cake Bar

12 oreos (double stuff are preferred)
192 grams flour ( 1 1/3 cups )
1 tsp cream of tartar
1/2 tsp baking soda
1/4 tsp salt
85 grams butter, softened ( 1/3 cup )
1/2 cup sugar
1/8 cup milk ( I did NOT use lactose free milk )
1 tsp vanilla extract
1 egg

Directions:

Preheat oven to 180°C/ 355°F
Line a 8x8 square baking pan with parchment paper.

Separate oreo's.....taking off one cookie but keeping the cream part attached to the other half of the cookie. And crush up the cookie part into fine crumbs; set aside for later.


Combine the dry ingredients in a small bowl and set it aside.
Cream butter and sugar until creamy. Add egg, milk and vanilla extract, continue mixing again until mixture is smooth and then fold in the dry ingredients. (mixture will be more like cookie dough).


Spread a thin layer of batter into the baking pan, onto the parchment paper (this is a little tricky because it will slip around a bit).


Now add your oreo's....the half with the cream filling.....


And then top with the remaining dough and then top with your set aside crushed cookies


Bake 40 minutes. Remove from baking dish to cool before cutting you cookie cake into bars.


This recipe swap was such a fun experience and I am already looking forward to the next one! I enjoyed browsing through Little Accidents in the Kitchen blog and am glad I stumbled upon this recipe.


HungryLittleGirl

February 19, 2013

Almond Biscotti

I really am trying to loose a few extra and unneeded pounds but I just can't help myself with not baking some sweets every so often. Thankfully I can control my cravings and don't eat too many at once. I seem to always eat more if I don't have anything sweet in the house to snack on. Anyone else have this problem??

I was going through my list of "tried and love" looking for a recipe for something that I know will turn out super and that will hit the spot. Have you ever had biscotti? It isn't your typical cookie and they aren't usually too sweet BUT  if you love coffee as much as I do then you probably love biscotti too.

I first made this while I was in Culinary School and am SO glad I saved this recipe. Thank You Chef Rogers for giving us this recipe and getting me hooked on Almond Biscotti!!! I wish you all could meet Chef Rogers....he was such a fun Chef to work with, you either enjoyed his personality or you didn't and if you didn't he knew ;-)


Almond Biscotti

1/2 cup butter, softened
1 1/4 cup sugar, divided
3 eggs
1 tsp vanilla extract
2 cups flour
2 tsp baking powder
1/8 tsp salt
1/2 cup chopped almonds

Directions:

Preheat oven to 375F. Line baking sheet with parchment paper and set aside.


Batter is sticky & soft but it is supposed to be this way.
Cream butter and 1 cup of sugar until light and fluffy. Add in one egg at a time, beating well after each addition. Stir in vanilla. Slowly add flour and baking powder to the butter mixture, along with the salt. Stir in almonds. Then divide dough in half and spread into two 12-in x 3-in rectangles. Sprinkle with the reserved 1/4 cup sugar before baking.

Bake 15-20 minutes or until golden brown. ***They are going to be a bit soft in the center still after this first step of baking***


Remove from oven and reduce oven heat to 300F. Lift the rectangles off of the cookie sheet but still on the parchment paper onto a cooling rack. Let cool for 15 minutes. After cooling, cut the rectangles 1/2 inch thick. Place the slices  cut side down onto an ungreased baking sheet. **you won't need parchment paper for this part even though mine are on it** Bake for 10 minutes; turn cookies over and bake for another 10 minutes.

Cool completely on cooling rack before storing in an airtight container.

December 7, 2012

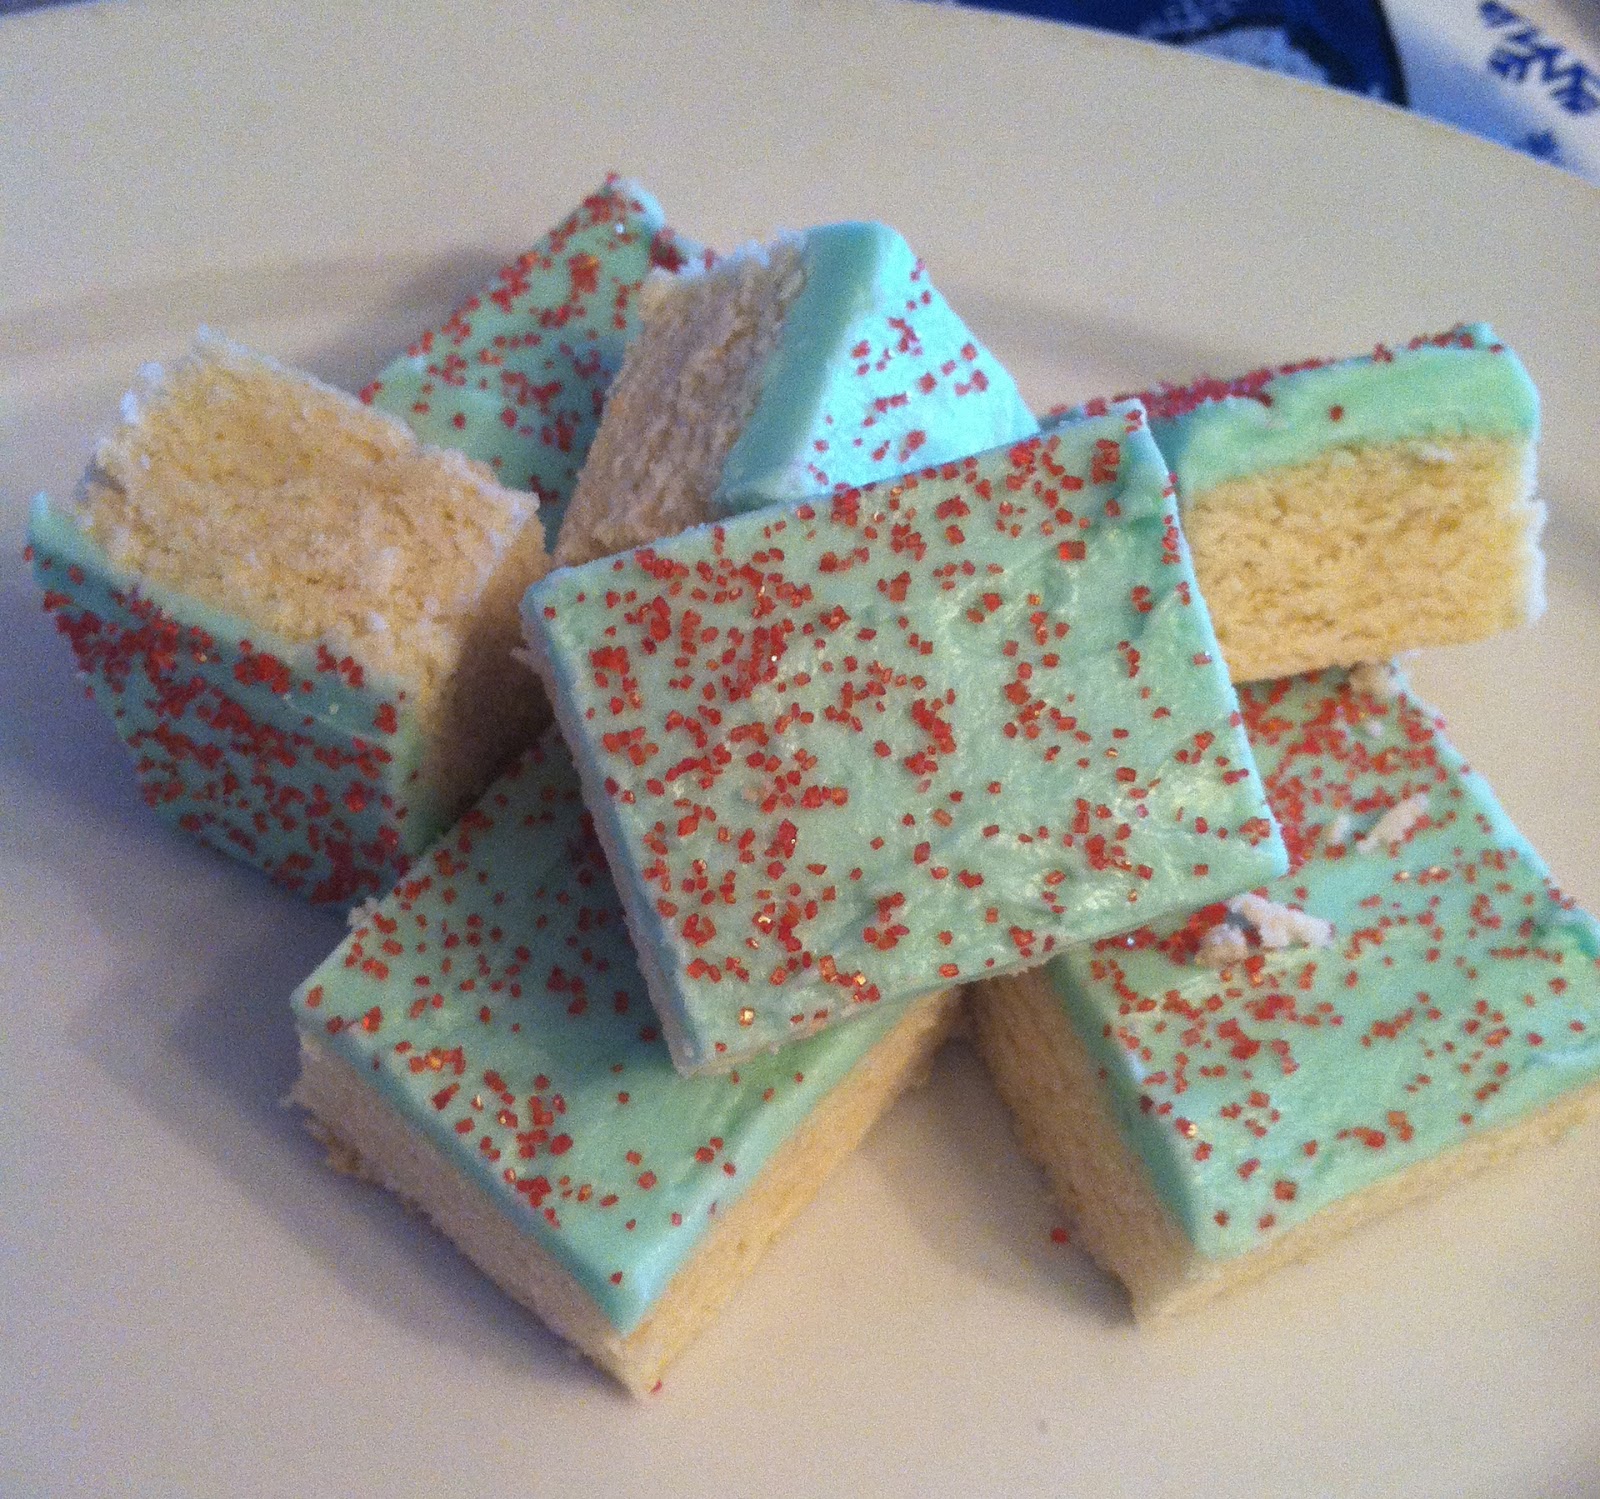
Sugar Cookie Squares

If you have young children then you have probably made cut out sugar cookies to decorate around the Christmas time. My kids love decorating sugar cookies for Santa, it is cute to listen to them talk about which one he will eat first, which one he will share with his elves or maybe even give to the reindeer.

Sugar cookies are yummy but sometimes they come out too hard, too thin or lacking flavor. The recipe I came across online has not only turned out to be a super easy recipe but didn't require a floured surface to roll out the dough on!! They came out full of flavor and super moist. I will be using this recipe for future sugar cookie cravings.....but of course if the kids "want" to roll out cookies for Santa I won't stop them!!


Sugar Cookie Squares

1/2 cup butter, softened
1 cup sugar
1 egg
1 egg white
1 1/2 TBS plain yogurt
1 tsp vanilla extract
2 1/2 cups flour
1 tsp baking powder
1/2 tsp salt

Directions:

Preheat oven to 375F 
Grease a 13x9 with nonstick cooking spray

Combine dry ingredients in a small bowl; set aside. Cream butter and sugar in a large bowl until fluffy. Add both the whole egg and egg white, vanilla extract and yogurt; mix until ingredients are incorporated. Slowly add the dry ingredient mixture; stir just until combine and dough comes together. **Do not over mix**
With lightly greased hands, press dough evenly into the prepared baking pan.

Bake 20 minutes, or until edges are lightly browned. 
**the top should not be brown, just the edges**

Now you can either leave the cookie in your baking pan to frost and cut into squares or you can let it cool about 15 minutes and then remove from baking pan to frost and cut. 


***next time I make these I am going to try to cut out shapes AFTER it comes out of the oven, I think it might work since the dough holds its shape well when cutting with a knife.....I will re-post an update once we give it a try***


December 2, 2012

Lemon Crinkles

Yesterday was not only our December book-club meeting but it also was our yearly Christmas Cookie Exchange. I brought 12 half dozen Lemon Crinkles to exchange and brought home 12 half dozen different cookies to try. I don't think baking this many cookies is the hard part of doing a cookie exchange for me it's deciding on which cookie to make. I have a collection of my all time favorites that I know taste great and turn out super but I also love trying new recipes out.

This year I decided to try out a new recipe I dug up online! This recipe is not only easy and requires very little ingredients but that taste great too. This recipe is going on my never-ending list of keeper recipes!


Lemon Crinkle Cookies 
                                                     makes about 2-3 dozen 

1/2 cup butter, softened
1 cup sugar
1/2 tsp vanilla extract
1 egg
1 tsp lemon zest
1 TBS lemon juice
1/4 tsp salt
1/4 tsp baking powder
1/8 tsp baking soda
1 1/2 cup flour
1/2 cup powdered sugar

Directions:

Preheat oven to 350F & line your cookie sheets with parchment paper.

Combine dry ingredients (EXCEPT the powdered sugar) and set aside.

Cream sugar and butter until fluffy. Add egg, vanilla, zest and juice; mix until ingredients are incorporated. Slowly stir in flour.

Either using a small scoop or a teaspoon scoop out dough and gently roll into balls, dip each in the powdered sugar to coat. Place on cookie sheet and bake 9-11 minutes (I actually had to bake mine 13 minutes but I rather put the lower time amount on here just in case your oven bakes hotter...its always easier to add a few minutes)

Cool for 2 minutes on cookie sheet before transferring to a cooling rack. Store in a airtight container.


November 21, 2012

Jeweled Coconut Cookies

My list of which cookies to make around the holidays seems to get longer and longer every year. I just can't help myself and am always looking to try an new recipe....I mean honestly you never know what you may stumble across when you leave your comfort zone!! When I first started baking and cooking I found most of my "now" favorites at Taste Of Home. Their website is chuck full of tried recipes and their magazines are not only full of recipes but usually have a picture to go with everyone of them. I am the type of person that can just imagine how yummy something may taste just by looking at the picture while reading the recipe. I have kept so many of my magazines so I always have visual to get inspiration from.....and again this doesn't help shorten my list!

Out of all of my "must try" or "looks yummy" this recipe is a MUST in my baking agenda. I love these cookies! I probably shouldn't limit these just to the holidays.
I have also made these for cookie exchanges. This recipe is easy to make ahead of time and easy to double.

Jeweled Coconut Crisps


Jeweled Coconut Cookies

1 cup butter, softened
1 cup sugar
2 TBS milk (I use lactose free milk)
1 1/2 tsp vanilla extract
2 1/2 cup flour
3/4 cup finely chopped red and green candied cherries
3/4 cup chopped pecans (optional....but I always add them)
1 cup flaked coconut

Directions:

Cream butter and sugar until fluffy in a large bowl. Beat in milk and vanilla.
Gradually add flour while mixing. Stir in cherries and pecans.

Shape into 2 8inch logs. Sprinkle coconut** on a cookie sheet and roll both logs in the coconut so that it sticks to the sides of the dough. Do not press too hard otherwise you will have oddly shaped cookies.

**I have made these and have added the coconut to the dough instead of rolling them in it. I personally prefer it this way rather than the rolling part.

Wrap logs in plastic wrap and chill for at least 4 hrs (can be chilled overnight if preparing ahead).

When ready to bake preheat oven to 375F.
 Remove dough from refrigerator, remove plastic wrap and cut into 1/4 inch slices.  Place onto cookie sheet at least 2 inches apart and bake 10-12 minutes or just until edges are lightly browned.

Cook on wire rack.


Makes about 5 dozen

November 16, 2012

Neapolitan Cookies

I told you about my very first cookie exchange and how I had to bring 12 dozen cookies with me. Well this is the exact recipe I used. It was not only really easy make but they also taste super yummy and look really cute in your cookie jar.....well mine is a glass see through jar ;-) Not only do they taste super yummy with a glass of milk but they also go well with coffee!


Neapolitan Cookies
Neapolitan Cookies                                                                Recipe adapted from: Taste of Home

1 cup butter, softened
1-1/2 cups sugar
1 egg
1 teaspoon vanilla extract
2-1/2 cups all-purpose flour
1-1/2 teaspoon baking powder
1/2 teaspoon salt
1/2 teaspoon almond extract
6 drops red liquid food coloring
1/2 cup chopped walnuts
1 ounce unsweetened chocolate, melted

Directions

Line a 9-in. x 5-in. loaf pan with waxed paper; set aside. In a large bowl, cream butter and sugar until light and fluffy. Beat in egg and vanilla. Combine flour, baking powder and salt; gradually add to the creamed mixture. 

Divide the dough into thirds. Add almond extract and food coloring to one portion; spread evenly into prepared pan.

Add nuts to second portion; spread evenly over first layer.

Add melted chocolate to third portion; spread over second layer.

Cover with waxed paper; refrigerate overnight. **These can be made and baked on the same day. I just start early preparing the dough and then put in the freezer for about 1 hour before cutting and baking.

Preheat oven to 350F.

Unwrap dough; cut loaf in half lengthwise. Cut each portion into 1/8-in. slices. Place 1 in. apart on parchment paper lined baking sheets.

Bake for 10-12 minutes or until edges are firm. Remove to wire racks to cool.


Yield: 12 dozen.


November 15, 2012

Cookie Exchange

One of my favorite things to do during the holidays is back cookies and I usually host a Cookie Exchange Party every year. My very first Cookie Exchange I was part of was a bit scary, we had to bake 12 dozen cookies!!! I thought there is NO WAY I can bake that many cookies and them taste good too....but I did. You should have seen all the different cookies I brought home from that exchange. It was a huge reward after baking so many of the same kind of cookie to have been able to come home with 12 different types of cookies to try.

My little helper & I

I am going to share cookie recipes with you and you share cookie recipes with me. Some of the recipes I will be sharing are directly from the cookbook or web page I got them from and others will be from my "secret" collection. I promise you though that every recipe I share with you has been tried and worth sharing. To keep the sharing going I ask for you to share a recipe too.


Photo Credit


NutterButter Santa Cookies

12 oz white baking chocolate, chopped (DO NOT USE WHITE CHOCOLATE CHIPS)
1 pkg Nutter Butter sandwich cookies
Red colored sugar (I have always used the red sprinkles you can find in the baking section)
About 35 white chocolate chips
About 64 mini semisweet chocolate chips
About 32 red hot candies (optional, I don't always add the red hot candy)

Directions:

In a microwave, melt white chocolate for 1 minute; stir. Microwave at additional 10- to 20-second at a time, stirring until smooth.

Dip one end of each cookie into melted chocolate, allowing excess to drip off. Place on wire racks so the excess chocolate can drip off. 

For Santa's hat, sprinkle red sugar on top part of chocolate. Press one vanilla chip off-center on hat for pom-pom; let stand until set.

Dip other end of each cookie into melted chocolate for beard, leaving center of cookie uncovered. Place on wire racks. With a dab of melted chocolate, attach semisweet chips for eyes and a red-hot for nose. 

Place on waxed paper until set.

Makes about 32 cookies


November 6, 2012

Brunch Worthy

Boy oh boy did this weekend fly by!! And the temperature in my house was WAY hotter then it was outside LOL but well worth the effort of all the yummy treats I made. I made so many different recipes and have found some keepers.


Here is a list of everything I made:

Mini Citrus Muffins (these are easy and great to take to a social gathering)
Banana-Blueberry Bread (this is a favorite of mine)
Pumpkin Cinnamon Rolls (requires time but the result is well worth it)
Crockpot Breakfast Casserole (besides the burnt spot from my slowcooker having a hot spot this casserole is a keeper, especially since it cooks overnight and is ready in the morning)
Angel Food Lemon Bars (these are the perfect combo of lemony-sweetness)
Jalapeño Popper Dip (this is an absolute keeper)

Then I have to share Tiffany's a-m-a-z-i-n-g chocolate chip cookie recipe!! I gave her the Jalapeño Popper Dip recipe in exchange for this cookie recipe.

November 1, 2012

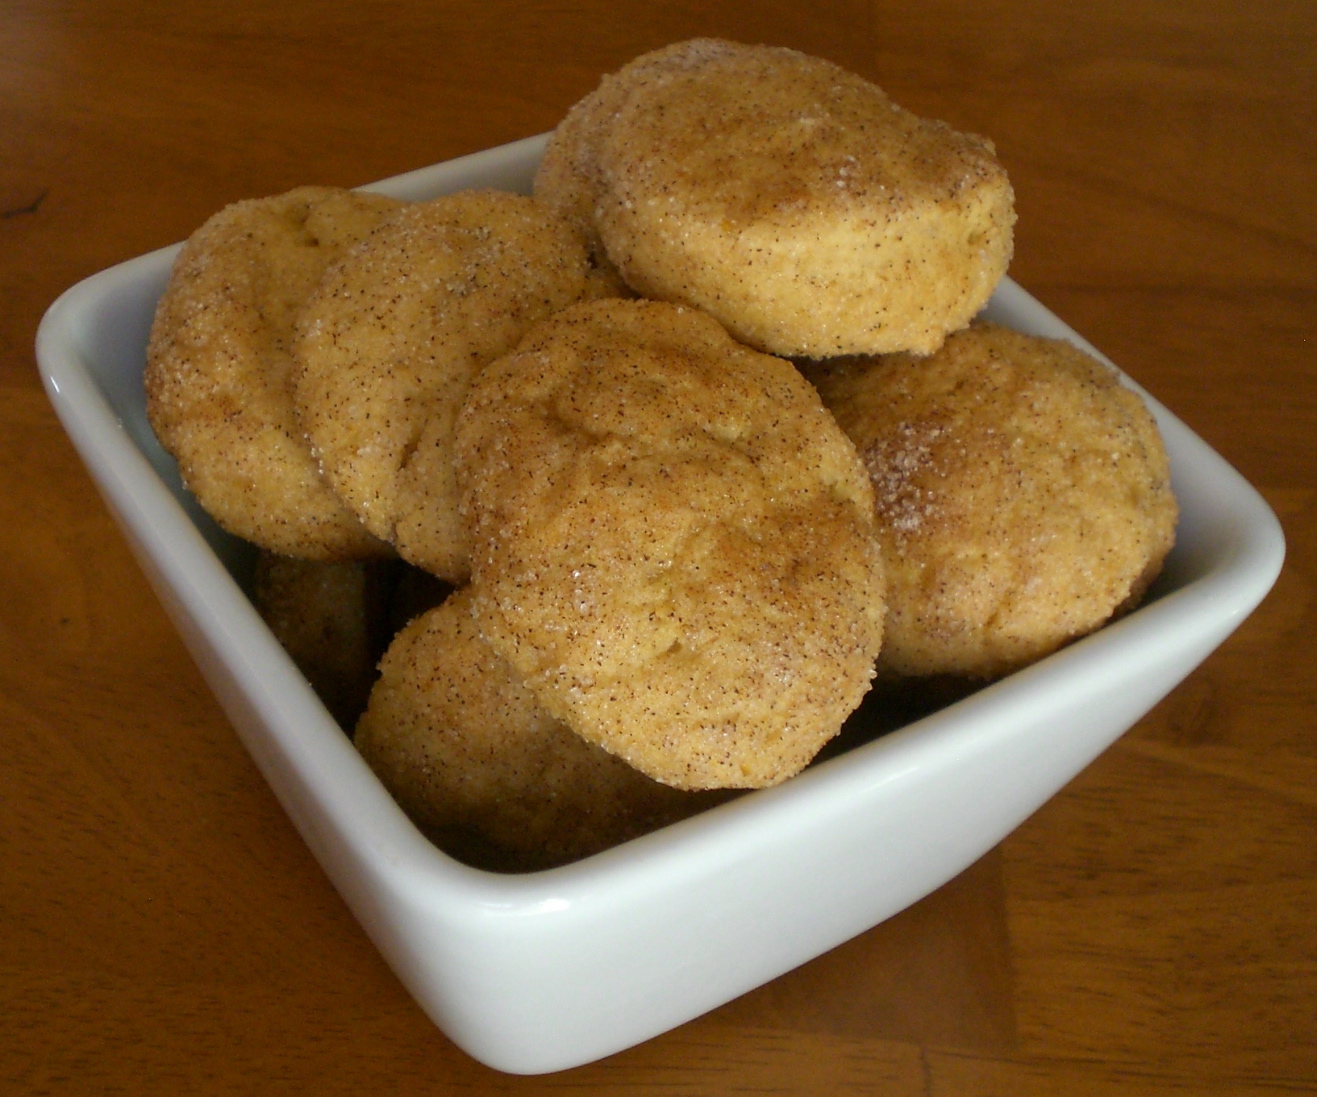
Pumpkin Snickerdoodles

Halloween is over and now we are going to be focusing all our attention to getting our menus together for Thanksgiving. These next few weeks are some of the yummies weeks of the year! I don't think there has been a fall season where I haven't wanted to bake more cookies or cook more soup. I would have to say September-January are my favorite months of the year. Another favorite of mine during these months are all the yummy recipes to use pumpkin in! But then again I like using it year round ;-)

These cookies are some of the best cookies I have made! They are not only delicious but they were the perfect blend between firm, fluffy and not too sweet but yet just the right amount of sugar that goes great with either a hot cup of coffee or a cold glass of milk.


Pumpkin Snickerdoodles

For the cookies:

1 cup butter, softened
1 cup sugar
1/2 cup brown sugar
3/4 cup pumpkin puree (not pumpkin pie filling)
1 egg
2 tsp vanilla extract
3 3/4 cup flour (sounds like a lot but it is right)
1 1/2 tsp baking powder
1/2 tsp salt
1/2 tsp cinnamon
1/2 tsp pumpkin pie spice

For the coating:

1/2 cup sugar
1 tsp cinnamon
1/4 tsp pumpkin pie spice

Directions:

Cream butter and both sugars until light and fluffy. Stir in pumpkin, then egg and vanilla; stir until incorporated.

While creaming the butter whisk the dry ingredients together in a separate bowl. Turn your mixer on low and slowly add the flour mixture to the creamed butter and pumpkin mixture. Mixture will be thick and sticky.

Either cover your bowl or transfer to a clean bowl and cover; chill in the refrigerator for at least 1 hour (I actually left mine in the refrigerator overnight, then took it out while the oven was preheating before baking). 

Preheat oven to 350F. Line baking sheets with parchment paper and combine the ingredients for the coating; set aside. Scoop dough and roll into equal size balls. Roll in the sugar coating, place on the baking sheets and gently push the cookies down to flatten the tops. Cookies will not spread much, so you don't have to leave more then 1 inch between cookies. 

Bake the cookies 12-14 mins, they should be slightly firm to touch for them to be finished. Let cool for 5 minutes on the baking sheet before transferring to a cooling rack. Cool completely before putting them into your cookie jar or tightly sealed container. These keep well! ENJOY!! 

October 22, 2012

Brown Sugar Oatmeal Chocolate Chip Cookies

After a long week of a teething and cranky baby, between the three of our children these two teeth have been by far the worst teething moment ever. I am glad that these are finally out and he is not feeling so miserable anymore. Fingers crossed that the rest of his teeth aren't this torturous for him. With him back on his normal napping routine I am finally finding a few moments to share our FAVORITE cookie recipe!


My original recipe had peanut butter which I left out to make sure that I could serve them to friends of ours who have a nut allergy. I knew the recipe worked with the peanut butter but decided to give it a whirl to see how they turn out without it. I have to honestly say that I LOVE these SO SO much more then with the peanut butter! They are a great combination of rich & chewy but at the same time a perfect crispness to them that goes well with either  a cold glass of milk or even a hot cup of coffee. They keep so well and don't loose their texture or taste even after a few days of being in our cookie jar...not that they usually last very long anyway in our house!

I think I am going to have a hard time finding another cookie recipe to top this....but no worries I won't give up that quick!

Brown Sugar Oatmeal Chocolate Chip Cookies

1/2 cup butter, softened
3/4 cup brown sugar
3/4 cup sugar
1 egg
1 tsp vanilla extract
1 cup flour
1 tsp baking soda
1/2 tsp salt
1 cup each rolled oats and chocolate chips

Directions:

Preheat oven to 375F and prepare your cookie sheets by lining them with parchment paper.

Cream butter with both sugars, until they are creamy. While the butter and sugars are mixing, combine your flour, baking soda and salt; set aside. Add egg and vanilla extract. After stirring in your egg and vanilla slowly start incorporating your dry ingredients. Mixture will start getting thick after adding in all your flour. Then add both the oats and chocolate chips at the same time. Stir just until incorporated.

Scoop dough using a TBS onto your cookie sheet leaving 2 inches in between each cookie because they do spread a bit.

Bake 8-11 minutes or until just lightly golden brown. Be careful not to over-bake these!!!
Cool on cookie sheet 2 minutes before moving them to a cooling rack.

Makes about 4-5 dozen (depending on size of spoon or scoop you use)


These also freeze well, you can either freeze them before you bake them or after they are completely cooled.
If you are freezing them before baking, scoop them onto your baking sheet and then put them into the freezer for about 30 minutes. Transfer them to a freezer safe ziploc and freeze until you are ready to bake them. When you are ready to bake them just pop them onto your cookie sheet while you are waiting on your oven to reach temperature. Baking time may increase by 2-3 minutes. It will depend on how long you leave them on your cookie sheet before baking.